|
Here are some step by step instuctions for carving a Romanian Cross also known as a Troitsa. The first thing you'll need
it a pattern. To save you some time, here is the pattern that I've made. It doesn't look good on the web, but please
click on the picture for a full size image.
|
|
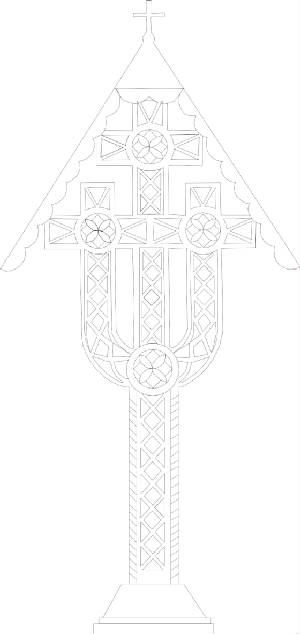
1. The first step is to make the pattern of what you would like the cross to look like. You could
use a pencil and draw directly on the wood if you are good a drawing. Because I am an engineer by profession, I use AutoCAD
to make my patterns. I know that it is hard to see above, but if you click on the picture, you will see the line drawing
you can use. AutoCAD has some real advantages such as: images can be re-scaled, straight lines can be drawn completely
straight; circles are perfectly round, and CAD can lead to CAM easily enough... If I want to make an engraving on brass using
a CNC mill, it is easy because the drawing is already in the computer. Here you'll see I just printed the drawing on a piece
of paper, photocopied it, and used an iron to transfer the toner from the paper to the wood. It is a great way to get
very clear patterns to carve.

2. You'll see that the next step is to carve out the tiny triangles and inverted pyramids that make
up the design. I use a chip carving knife, or sometimes a skew chisel. The idea is to first make a "plus" sign in the center
of the inverted pyramid. Then, cut with the grain of the wood to make the pyramid. What I mean by that is... starting at the
bottom of the pyramid cut up to side while holding the knife at an angle. The triangles are simply half pyramids. It is hard
to describe in words but if you'll search on "chip carving" you'll see many sites on the internet that can show you this technique
and many more.

3. After all the tiny chips are carve out, I sand away the extra toner that makes up the pattern.
Now you'll be able to see how the cross is really going to look. You might need to carve the triangles and pyramids a little
bit deeper. You can make the roof and the base. To make the roof, I re-saw (with a bandsaw) the same type of wood. To
get the angle right, I'll put the pieces on the troitsa and use a wide ruler to transfer the angle to both pieces. I'll glue
these together and fit them to the cross. To make the base, I glue two blocks to the front and the back of the cross and re-saw
them on the bandsaw and sand them smooth. Now the cross is really starting to take shape. All that is left to do is to use
a scrollsaw to cut the tiny cross that goes on top, and to carve the roof.
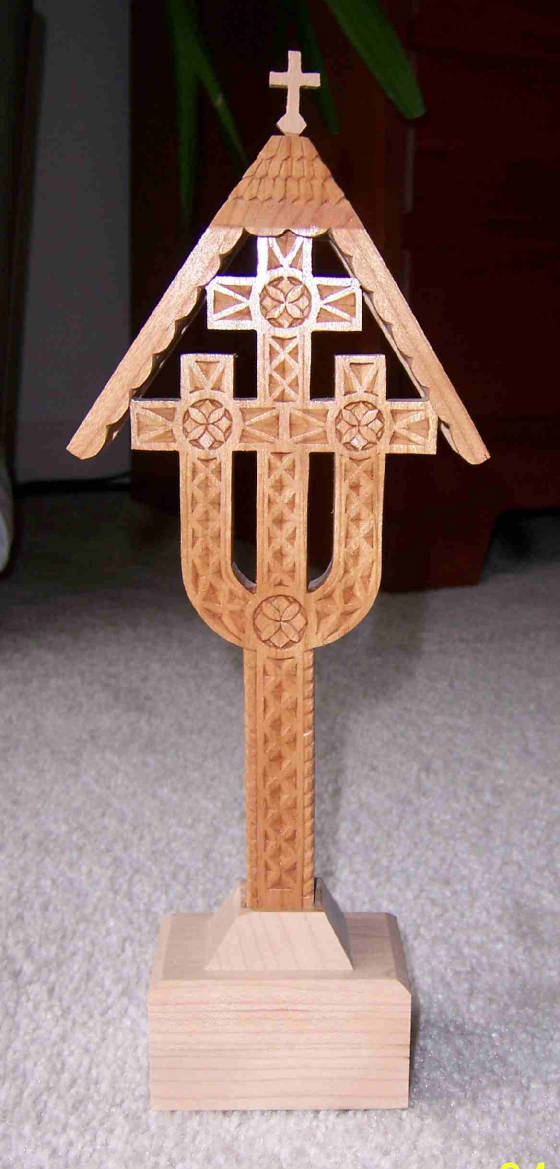
4. The last step is to make sure everything is right and apply the finish. I like to use Tung oil
first, followed by polyurethane. The Tung oil seems to really bring out the beauty of the wood while the polyurethane provides
a tough and durable finish. Here is a picture of the cross. You can really tell which wood has had finish applied to it. I
hope you'll try to carve this beautiful cross.
|